

 Establishing Dawn
The first thing i did was to look at images of dawn. I posted up these 4 because they are the most appropriate uses of examples and i can explain what i mean by their visuals. The top left has a ver heavy orange hue, the bottom left has a very heavy pink hue and the two on the right are much more subtle in their colours. I have chosen to talk about them like this because i can now establish that i like the two on the right better. I like the very calm pink hue in the bottom right picture, however i like the sun in the top right picture a little more. I will be using these as reference imagery for what i try to create in Maya.
I first had to try to establish what dawn looked like. Using Maya sun and sky i adjusted the height of the sun, which in turn adjusted the setting of the sun.
Very low sun

Sun appears over building

Sun fully over building

The three images above were test renders of shots i produced after setting up a mock scene of an environment. I chose to use a simple city scape as an example because it provided a great range of depth in the environments for areas of light and areas of shadow. Out of the three images above my favourite is the second one, however the slight pink glow from the first one has a nicer feel to me for some reason. The position of the sun in the second is also good, however better in the third, as it is dawn and id rather the sun at this higher position and able to be seen. The second is my favorite because of the very subtle shadows and tones, and to me it looks the most like dawn.
Here are some screen shots of the render view and the normal view in Maya.

Applying it to something similar...
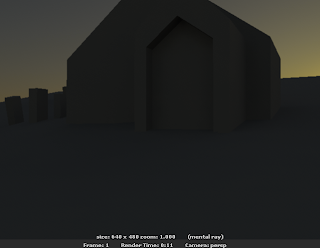
The next stage i felt was to try to apply what i learned to a scene similar to the outside of my scene i will be lighting for real. I created a simple shape resembling the building i will be lighting and had a go at lighting it.
Started off by applying sun and sky.
The look was too cool in colour palette, and didn't look much like dawn, so i decided to change the colours.


Tweaking the rotation of Sun And Sky, the sky had a more natural look to it as if it were a dawn sky. However i still had a problem with lack of pink hue in the sky, so i had to set about fixing this.


The image below is nice, it shows a good example of what dawn should look like in my opinion, however i would like to incorporate some sort of pink hue, as that is what is necessary for the project.


Adding a pink Hue

In the actual project, we need a very atmospheric sky, and speaking to my director, i was told that the sky needed to have a pink hue, so i went about trying to achieve this. There were a few ways i thought of doing it, i could tweak settings in Maya, or use a mask in post production to add a pink hue with after effects. These are the outcomes of the Maya tweaking.


Achieving a more natural look
With the sun and sky system in place i went about experimenting with other individual lights placed around the scene to reflect a nice warm pink glow off the building. I felt this was a problem in the previous renders as they looked a little unnatural, so i went about adding a new set of lights to give the impression of the lighting radiating off on to the building. Here are the outcomes.


Tweaking Gamma Controls
The gamma controls were the next things i set about tweaking, i felt the colours were much too saturated, and made the scene look a little fake, so i decided to desaturated them a little using gamma controls. From the images below i can say i prefer the top image.

Adjusting the size of the sun
The large sun is my favourite, i think it needs to be a little less obvious in the skyline, and maybe a bit more blended in to the sky, like in the reference imagery at the top of this post.
Small sun

Large Sun

Sky Dome Experiment
Another method i experimented with was sky domes. I started out by using a very simple sky dome i pulled off the internet, but when i tested it it didn't look very good, so i went on to experiment with colours and different ways of positioning the texture in the UV editor until i got a look i liked.
First attempt

Improved Sky-dome. More appropriate colour choice

I added a point light to create the illusion of sun lighting the front face of the building, however i think more lights are needed.

Added the second point light.

Simple lighting render of the sky dome and 2 point lights. Base lighting.

The outcome of my sky dome experiment is better than i thought it would be, however the colours were not what i wanted, i do think the general look and feel of the shot is better and it would look a lot more realistic than the sun and sky system method because it allows for clouds, and i can easily manipulate the positioning of the sky far more easily than i found i could do with sun and sky.
No comments:
Post a Comment